Make Up Archives - Page 4 of 5 -

Make Up

DIY: Natural Setting Spray for Acne-Prone Skin

DIY: Natural Setting Spray for Acne-Prone Skin lavish krish
 So there I was watching YouTube Beauty tutorials where the girls showed their favourite products.. A lot of them mentioned Mac’s Fix + Finishing/Setting Spray and they all said it was amazing. It made their makeup flawless after a few mists of this product. So I got really excited about buying this and I did buy it. I compared the Mac’s spray with my 100% Natural Finishing Spray. And here’s what I think which one is better and which suits what skin type.

You will be VERY surprised when I tell you about my skin-friendly setting spray. I use it after I have my foundation, concealer, bronzer and highlighter on and it just pulls the whole look together giving me flawless model-like makeup look.

Check out my recent post on Natural Mac Fix + Dupes.

It’s just simple Cold Water stored in a spray bottle. Yes, ONLY Cold Water.

I have bought the Mac Fix + twice because I REALLY liked it.
It was actually good but it made my skin a little shiny. So I tried again and didn’t spray too much this time but I had the same result. I had a shiny T-Zone.
Well I have naturally oily-combination skin so I thought this spray just made it more oilier.
But you can use it if you have dry skin.

natural setting spray for acne prone skin

When I use the Cold Water as a Finishing Spray, it makes me feel sooooo fresh and my make up is perfect. Its not too shiny and not too matte. It gives a subtle sheen which looks so natural and beautiful.
It wakes me up instantly if I am lazy in the mornings. And with this it doesn’t matter if you have dry or oily skin because it works with every skin type since it’s all natural.

It’s good for acne prone skin because it’s cold water, which calms the inflammation of acne. And there are no harsh chemicals going on your skin to aggravate the acne even more.
I use water from the cold tap in my bathroom to be honest. You can use cold filtered water as well if you want to be that careful but I just go for the tap water. Ain’t nobody got time to cool the filtered water haha.

The best thing is that it is absolutely FREE.

Check out this post for more acne prone skin tips: DIY: 100% Natural Toner for Sensitive, Acne-Prone Skin

So which one would you prefer? Comment below to let me know which works for you the best 🙂

And subscribe to my blog if you liked this post xx
.
Take Care.
post signature

Natural Bristle Brushes Vs Synthetic Bristle Brushes

Many people have asked this question about brushes. Now that I have used both types of brushes, I can tell you the differences between them. Although I will only tell you from my experiences. I haven’t researched of what everyone else’ opinions are. For example I have used Ecotools Retractable brush that has synthetic bristles and Inglot brush (4SS) with natural bristles. Both are good in terms of application depending on the type of coverage you want. Read more to find out which brush type suits you the best…

Ecotools Retractable Synthetic Brush:

  • It gives you higher coverage.
  • Suitable for winter time when you want full coverage.
  • Gives smooth and flawless application.
  • Doesn’t cover the pores anyhow.
  • The bristles are a little harder than natural bristles.
  • Can be identified by the colour of bristles. It has that ombre colour effect on the bristles. (you can see in the photos above).
  • The bristles somehow separate among themselves while applying foundation. This gets really annoying sometimes.

Inglot (4SS) Natural Brush:

      
  • I like this brush because it gives medium coverage which is great for summer.
  • It can make your pores invisible. If you want to learn the trick of getting pores invisible with natural brushes then scroll down and watch the linked video.
  • You need more product to work with this brush because somehow I think natural brushes absorb some product like a sponge.
  • The bristles are sooooo much softer than the synthetic ones.
  • This brush gives you a flawless doll look since it can hide away the pores effectively. 
  • Can be identified by the dark coloured bristles like shown in the picture above. 
  • These are more expensive than synthetic brushes but I think they are worth it. 
Btw Inglot sells both synthetic and natural brushes.

I hope now you know which brush will suit you the best 🙂
Comment below if you have any questions!

Take Care.

DIY: Make those Pores Invisible with Max Coverage by Make Up


I saw this video on YouTube by one of my favourite Make Up Gurus who proved that using brushes is the best way to apply foundation. You don’t believe me?
Well then test it out yourself…

  1. Using fingers to apply foundation: this will make the pores even more visible because your finger don’t reach the inside of the pores to fill them up. It only surrounds the pores which makes them more noticeable. 
  2. Using sponge to apply foundation: this is the technique I hate the most because the sponge absorbs most of the product so it wastes your foundation. You need twice the amount of foundation if you use a sponge to apply. Even the wet sponge does the same thing. 
  3. Using brushes to apply foundation: this will fill out the big pores because the thin hairs can reach and fill them. However make sure to deeply cleanse your face afterwards when you remove your make up. Otherwise you will have clogged pores.
Watch this video by Michelle Phan who demonstrated how brushes are better than other tools.

To make your pores invisible with make up, all you need to do is take a buffing brush like shown below and apply foundation in circular motion all around the face. This fills up those pores giving you max coverage.

The video below by Gossmakeupartist demonstrates how to do this technique. Its absolutely amazing and that’s what I will do from now on. I have huge pores too 🙁 so YAY I found this technique. I love this guy 😀

I hope this helped you girls 🙂 Take Care.
Follow Me on Pinterest

Love Krishna xxx

DIY: Expert Tips for Perfect Eyebrows

To be honest when I was 13, I used tweezers for my eye brows and they were NOT perfect at all. They were straight across and just awful.

Now, after 5 years I have learnt it from the experts on YouTube. I get soooo many compliments from my friends too. So of course I am speaking from my experience.

On the left is my picture before 4 years. I am in my uniform but anyways see the way my brows are straight across.. ughh :/
And now you can see me on the right. I took this picture a few weeks ago but its the latest one that clearly shows my brows.

I will also link a video on how to do threading at home. Threading might seem complicated but it’s not. Once you get used to it, you will be a pro. Click HERE for the tutorial.

Threading makes your hair grow slower than tweezing and that is why I use this method now.

Tips:

1) When you are tweezing/ waxing, relax your face and keep your brows in the normal position. DO NOT lift them and tweeze. Because this will give you that straight-across brow.
2) If you already have straight brows, start by growing some brow hair on the top and ALWAYS tweeze them from the bottom. Don’t tweeze them from the top until you get rid of the straight brow shape. This will give you that curve.
3) Try to tweeze your brows only from the bottom and very less from the top. This will help you maintain a good shape.
4) The inside of your brows should start from where your inner corner of the eye is or the edge of your nose.
5) The end of your brow should be diagonal to the edge of your nose to the outer corner of your eye. I hope this make sense.
6) In my opinion your arch should depend on the expression of your face. So lift your brows and you will kind of notice the arch and that’s where it should be. Otherwise you can follow the picture shown above.
7) If it is your first time then PLEASE get them done professionally and then you can maintain that shape. This is the mistake I made. It doesn’t cost much as well.

Let me know if it helped you 🙂 Take Care.

Follow Me on Pinterest

Love Krishna xxx

DIY: Face Highlighter for a Dewy Summer Look

Dewy looks have been popular in summer. They give your skin a healthy glow and makes your skin look healthy. If you have acne, then I would recommend you this because glowy/dewy skin hides acne imperfections.

All you need for this look is a good face primer and liquid eye shadow.
I know it sounds weird but keep reading to reveal the trick…

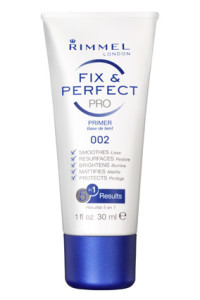
Apply the primer first to prevent the liquid eye shadow causing any skin problems. I always use my Rimmel’s primer. 

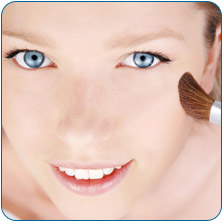
The primer will create a barrier between your skin and liquid shadow. Then very lightly dab the liquid shadow on the cheek bones to give a glow. You can also apply to the outer part of your face. Just follow the face chart in the picture shown.

You can choose this gold bronzy colour for the look shown in picture for a sun kissed glow.

Or you can apply a silver toned shadow for a cool natural look.

You can also use shimmery powder shadow but it won’t give you the dewy look. So I like the liquid one better.
Take Care.

Follow Me on Pinterest

Love Krishna xxx

DIY: White Pearly Teeth


You guys might have heard the baking soda trick for bleaching teeth but I am not going to mention this trick because I haven’t tried it and it is a common thing that every blogger say so I am going to tell you something different. Plus these tips are experienced so I know they are effective.

First of all do not go to the dentist to bleach your teeth because it is really harmful. You will have long term problems with your gums and other mouth diseases.
Secondly colgate whitening toothpastes never seem to work for me.
1) Buy those toothpastes that are ONLY made for teeth whitening. Because they work better. 
2) Brush your teeth twice in the morning and before going to sleep.
3) Avoid tea, coffee and sugar. They cause discolouration in teeth.
4) Eat foods rich in Vitamin C. They do the bleaching effect. You can rub an orange peel on your teeth before going to sleep.
Take Care.

Follow Me on Pinterest

Love Krishna xxx

DIY: 5 Ways to Reduce Redness on Face

Well, because I am Indian I have brown skin and so I don’t get much redness. But so many people requested me to do a post on this topic so I put a little research and I gathered all the tips and tricks.
From my research some people say that oily skin might cause redness. But before you jump to any decision, please check if your skin is oily or not.
Keep reading if you want to treat it au naturelle. 

1) Anti-redness Mask:

Oatmeal and Milk
Oatmeal has anti inflammatory properties which can reduce redness and we use milk because it calms aggravated skin plus it works as a gentle exfoliator due to lactic acid.


2) Hypnotherapy:

Yes, I know it is a fancy name but trust me all you need for this is your mind and body. It has been proven scientifically that if you can control your body with your mind, then you can prevent redness, blushing, sweating and many other problems. You can start with yoga.

3) Diet:

Avoid hot spicy food.

4) Make up Solution: 

Use green coloured concealer which cancels out the red colour of skin. But be careful using these products. Usually I wouldn’t recommend anyone to put make up on but if you don’t have time then you can use this short cut.

5) Most Common: 

And you girls may have heard of this a lot but lets just say it once more: Drink lots of water. I hear this a lot and it seems to be the solution of everything so why not give it a try. It can solve most of your skin problems.

Let me know about your experience. Take Care.

Follow Me on Pinterest

Love Krishna xxx

DIY: Tip for Long Lasting Curled Nourished Lashes

I have mascara on here.

This is the strangest tip ever and I promise you have never heard of it before. It doesn’t involve curlers or any lash-damaging stuff.

If you follow this tip you won’t need to use curlers and that is really good because curling lashes can make them brittle overtime.

This tip also helps to nourish my lashes. No matter how much mascara I use, they will not dry out and get brittle.


You Need

A really good nourishing moisturizer. I use Palmer’s Coco Butter.

The Tip is: 

Take some of your chosen moisturiser and rub it between your fingers to warm it up.
Now this is the strange part. Apply the moisturizer on your lashes.
Push your lashes upwards to open up your eyes. This will also curl them slightly without damaging your lashes.
Don’t apply too much or too little. Just enough to nourish them. Then you can apply your mascara.

Don’t worry, the mascara you apply after will not smudge or anything. It works amazing. You lashes will stay curled all day long.

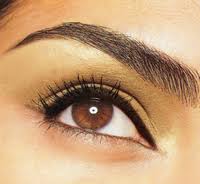
Ha! You can actually see my camera in the pupil 😛

And I am speaking from the experience. My lashes have never been in such a good condition.

Share you experience in the comments 🙂 Take Care.

Follow Me on Pinterest

Love Krishna xxx

DIY: Make-Up Removers for Any Skin Type

Hello Beauties! People are saving up money for Christmas and of course the R..rec.. recession. It’s horrible I know but you don’t have to worry. I have so many DIYs to fill up your piggy bank. Today’s post will be about how to make your own make up removers suitable for your skin type.

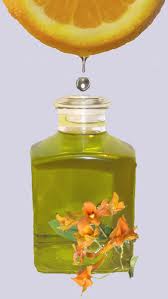
1) Grape fruit oil for dry skin.

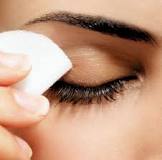
I would prefer Grapefruit oil because it penetrates easily through your skin. And its moisturizing enough for dry skin types. So get a cotton ball and dip it in the oil and simply sweep of all the make up. I would recommend you to soak or dampen your face before taking make up off with oil because it will make easier for you to take off the make up.

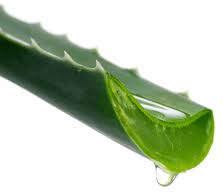
2) Water mixed with Aloe Vera for acne prone and sensitive skin.

You can get Aloe Vera at any health/drugs stores. So get any type of a container preferably a bottle. Pour 200 ml of water in and 100 ml of Aloe Vera. Close the bottle and shake it to mix them up. Dampen your face and soak a cotton with the mixture we made and simply take off all the make up.

3) Olive Oil for oily skin types.

You might be wondering how can I use an oil for oily skin. Don’t worry, it won’t make your skin oily because your skin can’t absorb olive oil. It just balances the amount of oil in your skin. In other words if your skin is oily, olive oil will reduce the oil in your skin. I know its weird but its a true fact. So dampen face and get a cotton ball. Dip it in the oil and sweep off the make up.

After using any of the above make up removers, wash your face with any face wash. I use Body Shop’s Tea Tree Oil Facial Wash and Neutrogena’s Oil-Free Acne Wash Pink Grapefruit Facial Cleanser.

Take Care

Love Krishna xxx

My Favorite Drugstore Products

Most of my favorite products are only from drugstores because from my personal experience they are the most effective than any other. I will also show some of my favorite makeup products.

1) Palmer’s Cocoa Butter 
It’s the BEST moisturizer for dry skin and it also prevents acne scars and if you have really old acne scars, this will get rid of them too. At least for me it worked really well. I would really recommend for the people with dry, sensitive skin. 
2) Pantene Pro-V Shampoo
I kinda have dry hair so this shampoo worked the best than any other. And it also gives a little softness to my hair. I haven’t tried pantene’s conditioner yet but I am sure it’s great. Most of the hairdressers use this shampoo too.
3) Neutrogena Grapefruit Face Wash
If you have any skin problems, this face wash is awesome for any skin type. It did make a difference in my skin like it got rid of some acne and scars. It has a little drying effect but it will be okay once you use your moisturizer. This product got an award for some kind of skin care product as well. 
4) Essence Lip Glosses
  
I LOVE all their lip glosses. If you want a little color and shine in your lips, choose the lip gloss shown in 1st picture from left called XXXL Shine. If you want a pop of color definitely choose Stay With Me lip gloss. It’s a little sticky, but to make a lip gloss non-stick, what I do is apply the Stay with me gloss first and I go over with XXXL shine one so then I have color and shine on my lips. If you want a natural sparkle and a little color then go with the last one on right. It’s perfect if you’re only going for a hang out with your friends.
5) Rimmel Match Perfection Foundation
Because I have dry skin, this foundation is perfect for me. It has great coverage and it lasts pretty long. For me it lasted around 10 hours max. It’s a little oily but perfect for my skin. I know people recommend using oil-free foundations but for some reason this one worked the best. All the other foundations I tried gave me pimples but this was the only one which didn’t. So I am really in love with this foundation. Also try out their concealer. It’s really creamy and has a good coverage. 
Let me know if you want to review any drugstores product. Also tell me your favorite drugstore product, I might just give it try. Take Care.
Love Krishna xxx