Body Care Archives - Page 6 of 6 -

Body Care

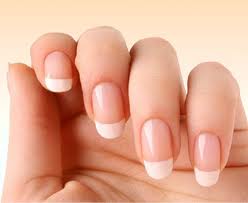
DIY: Strengthen your Nails Naturally

Do you get the pain when you break your nails as well? Well I don’t. Wanna know the secret? Then keep reading…

Here are some Treats I give to my Nails:

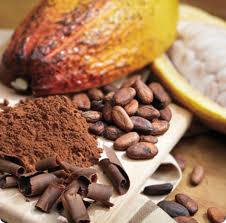
1)   Every time I wash my hands, I apply some hand cream and massage it on my cuticles for a minute. I use  Palmer’s Cocoa Butter. It is really moisturising. Dryness of nails can be the reason of breakage. So moisturising is the key.

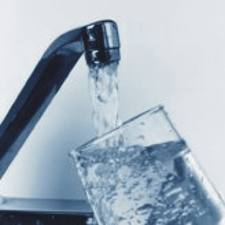
2)   Acetone can be really drying on nails. So after using a nail remover to take off the polish, I wash my hands with warm water to get rid of acetone or any other chemicals. Then I simply massage my hands and cuticles with the hand cream.

3)   I use Essence’s Nail Remover and believe it or not, my nails feels moisturised and it doesn’t have that squeaky clean, dry effect. Maybe because it contains coconut and papaya extract.

4)   Sometimes during winter, I massage some almond oil on my hands and cuticles for 2 mins. Then I put on cotton gloves and go to sleep. Cotton gloves doesn’t soak up the almond oil so the oil stays on hands to moisturise them. When you wake up, your hands will be really soft and your nails will be much stronger.

5)   Rubbing or Tapping your nails gently will increase blood circulation and so this will strengthen the nails. I use the Rubbing motion because its easier. Just rub your nails against each other for 2-3 mins everyday.

So here are all the things I do for my nails and to be honest, my nails hardly ever break. Or maybe it could be genes because my mum’s nails are really thick and strong.

But you girls can try these tips on your nails and see for yourself. There’s nothing to lose because it is all Natural.

Take Care.

Follow Me on Pinterest

Love Krishna xxx

Epilator Review

Epilator is an electrical device used for hair removal. Its like an electrical tweezer. It has many tweezers in them that electrically pluck out the hairs. So its like waxing but it doesn’t hurt as much. But I was really shocked when many people said they don’t know what it is.

I use this one from Argos

Pros:

  1. When I tried it out the first time, I was really excited. My hair didn’t grow back until 2 weeks amd that’s what I REALLY look for during the summer season. I mean who wants to go through the shaving process every other day. I definitely don’t. 
  2. Its pretty cheap actually. You only have to spend the money once unlike if you are waxing, you have to buy the wax strips again and again. Same with the razors. I bought mine for around €50 from Argos.
  3. You don’t get the razor burns or dry skin after using this. I used shaving gels which really dried out my skin. So I absolutely hate them.

Cons:

After two weeks when my hair started to grow back, I noticed that some were growing inside my skin. In other words I had some ingrown hairs. So I had to exfoliate again and again to avoid that. But I still like it.

Overall I really like this device and yes I would use it most of the times when I am not in a hurry.

Do you prefer epilator over the other shaving methods? Let me know in the comments 🙂
Take Care.

Follow Me on Pinterest

Love Krishna xxx

DIY: White Pearly Teeth


You guys might have heard the baking soda trick for bleaching teeth but I am not going to mention this trick because I haven’t tried it and it is a common thing that every blogger say so I am going to tell you something different. Plus these tips are experienced so I know they are effective.

First of all do not go to the dentist to bleach your teeth because it is really harmful. You will have long term problems with your gums and other mouth diseases.
Secondly colgate whitening toothpastes never seem to work for me.
1) Buy those toothpastes that are ONLY made for teeth whitening. Because they work better. 
2) Brush your teeth twice in the morning and before going to sleep.
3) Avoid tea, coffee and sugar. They cause discolouration in teeth.
4) Eat foods rich in Vitamin C. They do the bleaching effect. You can rub an orange peel on your teeth before going to sleep.
Take Care.

Follow Me on Pinterest

Love Krishna xxx

DIY: Most Effective Weight Loss Tip

When I was trying to lose weight, I tried everything from A- Z and they didn’t really work. I lost weight but then I gained the same amount. So I got really frustrated.

Then I heard about this tip on internet. I read it on so many blogs but I didn’t think it would work. Finally, I give it a chance and it came out to be the MOST effective tip I ever tried. My belly was flat and my thighs were slimmer as I wanted.

I lost about 4-5 kg and that’s how much I was aiming for. I wasn’t really fat but I wanted to keep my weight under control if you know what I mean.

So the tip is: Eat only and ONLY when you feel that you are hungry and only when you really need to eat something. Do not eat if you are full or half full. You can eat as many meals as you want but remember to eat them only when you are hungry. 

Also don’t eat 2 hours before going to bed. Drink lots of water. You can eat junk food but in a limited amount.

If you strictly follow these tips for at least 2 weeks, I promise you, you will lose weight.

This tip helps you lose belly fat, back arms fat and thigh fat. Basically everywhere girls are aiming to lose fat these days.

I hope you guys get to your aimed scale. Take Care.

Follow Me on Pinterest

Love Krishna xxx

DIY: 8 Ways to Get rid of Black Knees/Elbow

Black Knees and Elbows is common in South Asian/African communities. And unfortunately I had them too :(. But how come all the celebrities don’t have them? I wondered and then I did a little bit of research and came up with 8 Natural ways to cure it.

I was a little ashamed of them and I couldn’t wear short/skirts when I was 13 but now I wear them without being embarrassed of them. Knees and Elbows become dark because of dead skin cells. To get rid of these dead skin cells, you need ingredients that exfoliate and bleach dark skin Naturally.

After trying out these recipes, It is very important to MOISTURISE. Any moisturiser will work but I recommend cocoa butter or olive oil or almond oil. If you don’t moisturise them then they will become darker.


1) You Need:
Baking Soda
Milk


Mix enough milk to make baking soda a little damp. Apply the paste on knees or elbows and scrub it in circular motions.

Repeat these steps until you notice, your knees have became lighter

2) You Need:
1 tsp Turmeric
1 tsp Sugar
1 tsp Olive Oil

Turmeric lightens the skin and olive oil provides the moisture to dry skin. Sugar gets rid of the dead skin cells!
Mix them well together and Apply + Rub in Circular motions.

3) You Need:
Lemon
Gram Flour

Add enough lemon juice to make gram flour damp. Lemon is a natural bleach and will reduce the darkness. Apply + Rub in Circular motions.
However, gram flour can be a little drying on skin so if you already have dry skin then I suggest you not to try this remedy.

4) You Need: (I tried this one and it worked pretty well for me)

Almond Oil

Just rub the almond oil on knees. This oil has natural bleaching properties and will also make your skin glow. It is the most inexpensive way.
I did this every night before going to bed! And I noticed the results in only 2 weeks.

5) You Need:

Anything that exfoliates your body (loofah, dry brush etc…)

Scrub your knees with loofah or whatever you have, when you are having a shower and scrub with them in circular motions.
Sometimes the dark pigmentation is caused by the build-up of dead skin cells. And to get rid of them exfoliation is the key  🙂

6) You Need:
Really amazing moisturiser. I recommend either Cocoa butter or Shea butter

Dark knees/elbows are also caused by dry skin, so you need A LOT of moisturiser if you notice your knees/elbows are flaky.  {P.S Shea butter is the BEST moisturiser I have ever tried}

7) You Need:
Sunscreen Lotion

Knees/elbows are most exposed in sun during summer. No doubt they will become dark if exposed without sunscreen lotion applied. You can use sunscreen lotion as a moisturiser and to lighten dark knees/elbows after shower. 

8) You Need:
Aloe Vera Gel

Aloe Vera gel reduces dark scars/sun damage caused by over-exposure of knees/elbows. You can buy pure aloe Vera gel from any drug stores/pharmacies/health stores.


One of the tricks I used:
Take two strips of cloth that are wide enough to cover your knees/elbows and some almond oil. Apply almond oil on knees/elbows and massage it for 2 mins. Tie 2 strips of cloths around knees to keep the moisture in and leave them over night. In the morning, scrub your knees/elbows with loofah and wash off the oil in the shower. Moisturise your knees/elbows after shower and Repeat until you see results.

Hope it works for you guys.
Take Care.

post signature

DIY: 7 ways to get rid of dark circles/ANY type of scar/Stretch Marks.

These 7 ways I am sharing, are theMOST EFFECTIVE ways that makes those ridiculous scars disappear, no matter what type they are (acne scars, tissue scars etc). Make sure you are NOT allergic to any of the ingredients I am going to mention.

1st Solution: (For dark circles and scars) You Need:

1/2 tsp Turmeric
1 tsp yogurt (at least 10% fat)
4-5 drops Lemon Juice

Directions:

You can find turmeric powder in any Asian/Indian stores. Mix the ingredients together in a small container and Apply it on the scar. Leave it on for as long as you can but at least more than 10 mins. It won’t show results only in one go. Repeat the steps everyday until the scar is completely gone. Usually it takes around 2 weeks.

2nd Solution: (For Dark circles, scars and stretch marks) You Need:

Aloe Vera Gel

Directions: 

You can find this gel at any drugs stores/pharmacies. Take some gel (depends on the size of the scar) and rub it on the scar in Circular Motions until your skin absorbs it.

3rd Solution: (For scars and stretch marks) You Need:

1 tbsp Virgin Olive Oil
1/2 tsp turmeric powder/ gram flour

Directions:

Mix them well and apply it on the scar. Leave it as long as you can. You can also rub ONLY olive oil and leave it on the scar overnight. It will be more effective.

 
4th Solution: (For scars only) You Need:

A slice of lemon

Directions:

Just rub it on the scar in circular motions. Do not rinse it off. Leave it over night and rinse it in the morning. Or leave it as long as possible.

 
5th Solution: (For dark circles, scars and stretch marks) You Need:

Cocoa Butter

Directions:

You can find this at any drugstores/pharmacies. They are pretty cheap. For dark circles, just dab it on the skin under eyes. For scars and stretch marks, rub it in circular motions until they disappear. Usually takes 2 weeks.

 
6th Solution (For scars and stretch marks) You Need:

Bio-Oil

Directions: 

You can find these at any drugstores/pharmacies. Apply it as directed on the bottle. These are effective on very old scars.


7th Solution: (For Built up tissue scars, acne scars and stretch marks) You Need:
Silicone Scar sheets
OR
Cica care Gel Sheet

Directions:

These are a little pricey but VERY effective. Buy them from drugstores/pharmacies. Apply it as directed on the pack. These also work on those tissue scars which are built up from stitches or any wounds. Works excellent on stretch marks too.

I hope it works on you all.

Take care.

post signature